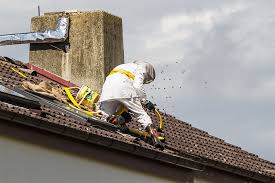
Wasp nests can be a source of significant concern for homeowners, particularly during the warmer months when these stinging insects are most active. It’s essential to address wasp nests promptly to protect your family and pets from potential stings and allergic reactions. This guide provides professional, actionable steps to safely and effectively remove a wasp nest, ensuring you handle the situation with care and confidence.
Understanding the Risks
Before you attempt to remove a wasp nest, it’s crucial to understand the risks involved. Wasps can become highly aggressive if they feel threatened, and their stings can cause severe reactions in some individuals. Therefore, always prioritize safety and consider the following precautions:
1. Assess the Situation: Observe the nest from a safe distance. Determine its size and location, and note the level of wasp activity. A larger nest or one located in a difficult-to-reach area may require professional intervention.
2. Wear Protective Clothing: If you decide to proceed with removal, wear protective clothing that covers your entire body. This includes long sleeves, gloves, pants, and a hat. Consider using a beekeeper’s veil for additional protection.
3. Plan Your Approach: Remove the nest during the early morning or late evening when wasps are less active. Ensure you have an escape route planned in case the wasps become aggressive.
Steps for Safe Wasp Nest Removal
1. Gather Necessary Equipment
To safely remove a wasp nest, you’ll need the following items:
• Protective clothing
• A wasp spray specifically designed for nest removal
• A flashlight (if performing the removal at night)
• A plastic bag or a heavy-duty garbage bag
• A long stick or broom
2. Apply the Wasp Spray
Stand at a safe distance from the nest and use a wasp spray to saturate it thoroughly. Follow the manufacturer’s instructions for the correct usage and dosage. The spray should contain quick-acting chemicals that neutralize the wasps on contact.
3. Monitor the Nest
After applying the spray, wait for at least 24 hours to ensure that all the wasps are eliminated. Observe the nest from a safe distance to confirm there is no remaining activity. This waiting period is crucial to avoid the risk of being stung by any surviving wasps.
4. Remove the Nest
Once you have confirmed that the wasps are no longer active, it’s time to remove the nest:
• Equip yourself with protective clothing once again.
• Carefully dislodge the nest using a long stick or broom, making sure to avoid contact with any remaining wasps.
• Place the nest in a plastic bag or heavy-duty garbage bag and seal it tightly.
• Dispose of the bag according to local regulations, ensuring it is placed in a secure trash bin.
When to Call a Professional
While DIY methods can be effective for small nests, larger or hard-to-reach nests may require professional assistance. Pest control experts have the experience and equipment necessary to handle extensive infestations safely and efficiently. If you are unsure about your ability to remove the nest, it’s always best to contact a professional.
Preventing Future Infestations
Prevention is key to avoiding future wasp nests. Here are some tips to keep your home and yard free of these stinging pests:
• Seal Entry Points: Inspect your home for gaps or cracks where wasps could enter and seal them with caulk or other suitable materials.
• Remove Food Sources: Keep food and sugary drinks covered when outdoors, and promptly clean up any spills or crumbs.
• Regular Inspections: Periodically check your property for signs of wasp activity, particularly during the spring and summer months.
By taking proactive measures and knowing how to handle wasp nest removal safely, you can protect your home and family from the dangers posed by these insects. Remember, when in doubt, always consult a professional to ensure the safe and effective removal of a wasp nest.
The Guide to Safe and Effective Wasp Nest Removal

Categories:

